微软近期开源了一个新的名为 Open Service Mesh 的项目并准备捐赠给 CNCF 。
基本介绍
Open Service Mesh (OSM) is a lightweight, extensible, Cloud Native service mesh that allows users to uniformly manage, secure, and get out-of-the-box observability features for highly dynamic microservice environments.
Open Service Mesh(OSM)是一个轻量级,可扩展的云原生服务网格,它使用户能够统一管理,保护和获得针对高度动态微服务环境的开箱即用的可观察性功能。
OSM 在 Kubernetes 上运行基于 Envoy 的控制平面,可以使用 SMI API 进行配置。它通过以 sidecar 的形式注入 Envoy 代理来工作。
控制面负责持续配置代理,以配置策略和路由规则等都保持最新。代理主要负责执行访问控制的规则,路由控制,采集 metrics 等。(这和目前我们常见到的 Service Mesh 方案基本都一样的)
显著特性
- 基于 Service Mesh Interface (SMI) 的实现,主要包括
Traffic Access Control,Traffic Specs和Traffic Split。剩下的Traffic Metrics正在开发中; - 服务间的通信加密使用 mTLS ;
- 定义和执行服务间的访问控制策略;
- 通过 Prometheus 和 Grafana 完成其观察性;
- 可与外部证书管理服务进行集成;
- Envoy sidecar 自动注入;
上手体验
只做介绍未免太过无趣,而且说实话,这么多 service mesh 实现,不亲自上手试试看,感觉不出来太多差异的。
这里我使用 KIND 作为我本地的实验环境。
安装
安装过程很简单,直接去 Release 页面 下载预编译好的二进制文件。可将二进制文件加入到 $PATH 中。
(MoeLove) ➜  ~ wget -q https://github.com/openservicemesh/osm/releases/download/v0.1.0/osm-v0.1.0-linux-amd64.tar.gz
(MoeLove) ➜  ~ tar -xzvf osm-v0.1.0-linux-amd64.tar.gz
linux-amd64/
linux-amd64/LICENSE
linux-amd64/README.md
linux-amd64/osm
(MoeLove) ➜  ~ cd linux-amd64
(MoeLove) ➜  linux-amd64 ls
LICENSE  osm  README.md
在进行 osm 资源和服务的正式安装前,先做个必要的检查:
(MoeLove) ➜  linux-amd64 ./osm check --pre-install
ok: initialize Kubernetes client
ok: query Kubernetes API
ok: Kubernetes version
ok: can create namespaces
ok: can create customresourcedefinitions
ok: can create clusterroles
ok: can create clusterrolebindings
ok: can create mutatingwebhookconfigurations
ok: can create serviceaccounts
ok: can create services
ok: can create deployments
ok: can create configmaps
ok: can read secrets
ok: can modify iptables
All checks successful!
可以看到主要是和权限相关的一些检查。接下来就正式对 ocm 相关资源进行部署。
默认使用的镜像,托管在 DockerHub 上,如果需要配置加速的小伙伴,可传递 --container-registry 更改源地址,以便于加速安装进度。
(MoeLove) ➜  linux-amd64 ./osm install

OSM installed successfully in namespace [osm-system] with mesh name [osm]
(MoeLove) ➜  linux-amd64 kubectl -n osm-system get pods
NAME                              READY   STATUS              RESTARTS   AGE
osm-controller-d499d6cc7-88659    0/1     ContainerCreating   0          12s
osm-grafana-58ff65dfb7-svztv      0/1     ContainerCreating   0          12s
osm-prometheus-5756769877-zj6f6   0/1     ContainerCreating   0          12s
zipkin-6df4b57677-dcq8q           0/1     ContainerCreating   0          12s
可以看到默认安装完成后,都在 osm-system 命名空间下,有 4 个 Pods
- osm-controller:控制谬
- osm-grafana:Dashboard 相关,可通过
osm dashboard命令唤起; - osm-prometheus:采集 metrics ;
- zipkin:链路追踪
还有对应的 service 记录.
(MoeLove) ➜  linux-amd64 kubectl -n osm-system get svc
NAME             TYPE        CLUSTER-IP       EXTERNAL-IP   PORT(S)             AGE
osm-controller   ClusterIP   10.97.115.1      <none>        15128/TCP,443/TCP   7m46s
osm-grafana      ClusterIP   10.110.209.86    <none>        3000/TCP            7m46s
osm-prometheus   ClusterIP   10.97.10.65      <none>        7070/TCP            7m46s
zipkin           ClusterIP   10.103.150.158   <none>        9411/TCP            7m46s
以及一系列的 CRD
(MoeLove) ➜  linux-amd64 kubectl -n osm-system get crd
NAME                                      CREATED AT
backpressures.policy.openservicemesh.io   2020-08-06T16:14:03Z
httproutegroups.specs.smi-spec.io         2020-08-06T16:14:03Z
tcproutes.specs.smi-spec.io               2020-08-06T16:14:03Z
trafficsplits.split.smi-spec.io           2020-08-06T16:14:03Z
traffictargets.access.smi-spec.io         2020-08-06T16:14:03Z
实践
- 创建实验用的 namespace, 并通过
osm namespace add将其纳入管理范围中:
(MoeLove) ➜  ~ kubectl create ns bookstore
namespace/bookstore created
(MoeLove) ➜  ~ kubectl create ns bookbuyer
namespace/bookbuyer created
(MoeLove) ➜  ~ kubectl create ns bookthief
namespace/bookthief created
(MoeLove) ➜  ~ kubectl create ns bookwarehouse
namespace/bookwarehouse created
(MoeLove) ➜  ~ osm namespace add bookstore bookbuyer bookthief bookwarehouse
Namespace [bookstore] succesfully added to mesh [osm]
Namespace [bookbuyer] succesfully added to mesh [osm]
Namespace [bookthief] succesfully added to mesh [osm]
Namespace [bookwarehouse] succesfully added to mesh [osm]- 部署实验应用程序
# 在项目的代码目录中执行
(MoeLove) ➜  osm git:(main) kubectl apply -f docs/example/manifests/apps
Warning: kubectl apply should be used on resource created by either kubectl create --save-config or kubectl apply
namespace/bookbuyer configured
serviceaccount/bookbuyer created
service/bookbuyer created
deployment.apps/bookbuyer created
Warning: kubectl apply should be used on resource created by either kubectl create --save-config or kubectl apply
namespace/bookstore configured
service/bookstore created
service/bookstore-v1 created
serviceaccount/bookstore-v1 created
deployment.apps/bookstore-v1 created
Warning: kubectl apply should be used on resource created by either kubectl create --save-config or kubectl apply
namespace/bookthief configured
serviceaccount/bookthief created
service/bookthief created
deployment.apps/bookthief created
Warning: kubectl apply should be used on resource created by either kubectl create --save-config or kubectl apply
namespace/bookwarehouse configured
serviceaccount/bookwarehouse created
service/bookwarehouse created
deployment.apps/bookwarehouse created
trafficsplit.split.smi-spec.io/bookstore-split created- 本地访问
你可以通过 kubectl port-foward 在本地对刚才部署的应用进行访问。示例中也提供了相应的启动脚本 scripts/port-forward-all.sh ,注意这里需要先安装 GNU parallel ,例如: dnf install parallel .
(MoeLove) ➜  osm git:(main) ✗ ./scripts/port-forward-all.sh
Academic tradition requires you to cite works you base your article on.
If you use programs that use GNU Parallel to process data for an article in a
scientific publication, please cite:

  O. Tange (2018): GNU Parallel 2018, Mar 2018, ISBN 9781387509881,
  DOI https://doi.org/10.5281/zenodo.1146014

This helps funding further development; AND IT WON'T COST YOU A CENT.
If you pay 10000 EUR you should feel free to use GNU Parallel without citing.

More about funding GNU Parallel and the citation notice:
https://www.gnu.org/software/parallel/parallel_design.html#Citation-notice

To silence this citation notice: run 'parallel --citation' once.
访问本地的 8080~8083 端口即可看到示例项目。例如:
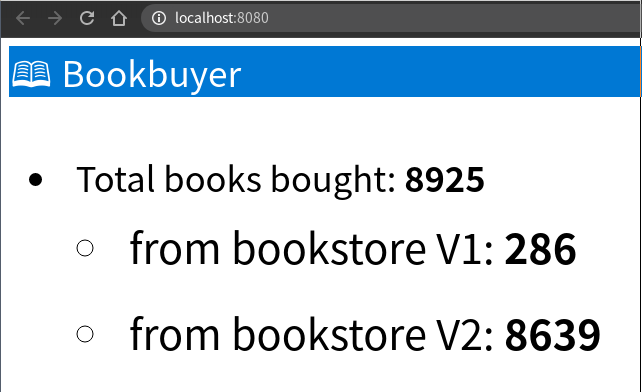
备注:这里是因为我的应用程序已经运行一段时间了,如果是新部署的,所有数字皆为 0
- 访问控制策略
我们来看看如何调整访问控制的策略
kind: TrafficTarget
apiVersion: access.smi-spec.io/v1alpha2
metadata:
  name: bookstore-v1
  namespace: bookstore
spec:
  destination:
    kind: ServiceAccount
    name: bookstore-v1
    namespace: bookstore
  rules:
  - kind: HTTPRouteGroup
    name: bookstore-service-routes
    matches:
    - buy-a-book
    - books-bought
  sources:
  - kind: ServiceAccount
    name: bookbuyer
    namespace: bookbuyer
  #- kind: ServiceAccount
    #name: bookthief
    #namespace: bookthief
---
apiVersion: specs.smi-spec.io/v1alpha3
kind: HTTPRouteGroup
metadata:
  name: bookstore-service-routes
  namespace: bookstore
spec:
  matches:
  - name: books-bought
    pathRegex: /books-bought
    methods:
    - GET
    headers:
    - host: "bookstore.bookstore"
    - "user-agent": ".*-http-client/*.*"
    - "client-app": "bookbuyer"
  - name: buy-a-book
    pathRegex: ".*a-book.*new"
    methods:
    - GET
    headers:
    - host: "bookstore.bookstore"
这里定义了两个 SMI 中的资源 TrafficTarget 和 HTTPRouteGroup ,用来控制入口流量。
(MoeLove) ➜ osm git:(main) ✗ kubectl apply -f docs/example/manifests/access/通过以上命令创建这两个资源。然后再次打开我们的示例应用程序,就会看到对应的计数正在逐步增加(因为请求被放行了) 。
以上示例来自于项目仓库 中的示例。
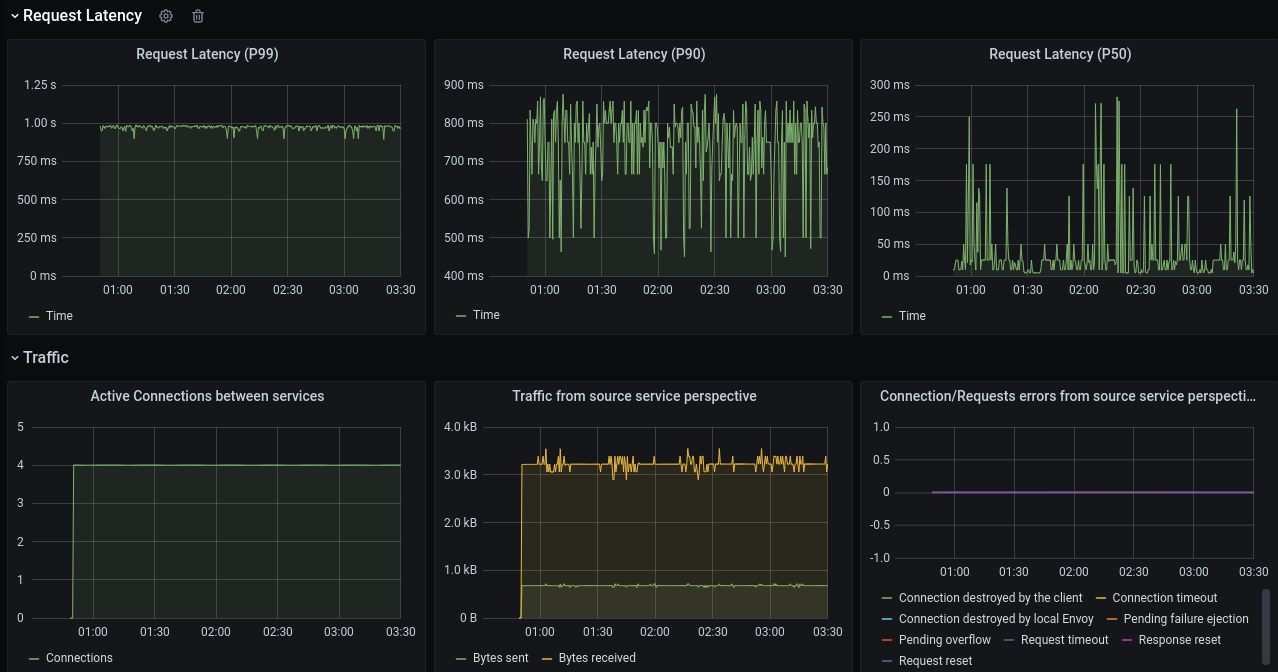
Dashboard
通过 osm dashboard 可直接唤起本地浏览器,并 port-foward 将 Grafana 打开。
总结
Open Service Mesh 相对来说,确实很轻量。 所需要的访问控制,流量切割等功能通过自己创建 SMI 资源来控制。
并且,在同一个集群内可存在多组 mesh ,osm 安装的时候,可指定 mesh 名称。
此外,这个项目也是微软在 Service Mesh 方向的又一个大动作了。目标也许是 Istio 。让我们拭目以待。
欢迎订阅我的文章公众号【MoeLove】

Comments